A{pallet}othecary: The Details

Let me start off by saying……I would not build another one the way that I built this one. It’s tremendously hard to be this cheap. My goal was to spend the least amount of money possible to build an apothecary table for our front entry way. I just picked up a ton of pallets for free from the Craigslist free section. I used this Ana-White building plan; Apothecary Console Table, and Pottery Barn’s Andover Table, here. I needed to change the overall dimensions so that it would fit onto our hallway wall. I also needed to change the dimensions based on the resources that I had….aka. pallets.
I had to dig deep through my pile of wood from pallets. If you want to know one of the best ways to disassemble a pallet check out my post, here, about that. I needed a 12” wide board but obviously none of the pallets had this size board. Some had a perfect 6” wide board and some had 5.5” wide boards. I knew that I was going to want to cleanup the sides by running the boards through my table saw, so I decided to make the whole console 11” deep. I found enough boards that were wide enough to make my sides, top, bottom, and top shelf. I took out any remaining nails, ran the boards through my planner to get smooth, and then ran the boards through the table saw twice to get the edges clean/square.


I had to strategically pair up the boards so that the widest boards would form my sides and then second priority being the top and bottom. I took the pair of boards, used my biscuit cutter every 9” and then clamped and glued them together to form a single 11” wide board.


I chose to wait til they were joined together before I cut them to length. So once the glue dried and cut them down to 35” for the sides and 33.5” for the top, bottom, and top shelf. Once they were cut the length, I started to plan/prepare to build my outer box. I used my Kreg jig to drill pocket holes on the inside and had all my boards ready to go. After that, I used wood glue, clamps, and screws to get the box formed. I also used my square onto every 90degree angle and a level for the top shelf.


I then had to join together another 11” wide board that would become the cabinet divider and the middle line that you would visually be able to see when the doors were closed. This divider along with the top shelf and the small dividers for the top shelf are critical to give this console table the appearance of being filled with 20 individual drawers where in reality it only has 4 drawers and they rest are false fronts. Close examination of the Pottery Barn table revealed to me that’s how they did it.


On a visit to a local antique store, I came across this random piece of old wood left outside. I brought the owner over to it and to some other pieces I had my eye on and asked him how much he wanted for it. $5. So for $5, I got this amazing piece of old antique wood. It was a little rotted on the edges so I had to cut that off and then I needed to cut it to length. To do this, I made my mark, lined up my circular saw, and then clamped down a piece of wood (square to the edge) to serve as my circular saw’s guide…..to ensure a nice clean/square straight cut.


Next up…..the drawers. I dug back deep into my pile of wood. There was not many 5.5” wide boards…..but I had just enough to cut all the sides, fronts, and backs for the 4 drawers that I was going to construct. Since I was going to do this 4 times, I clamped down some wood so that I could just push things together and nail them in. I used wood glue and my finish nailer to whip these together.


I almost forgot that they were going to need bottoms. I used whatever boards I could find and cut them to fit.


One other thing that I noticed on close examination of the Pottery Barn table was that along the bottom footer they had it indented about 1/2”-1”. So…..I made some little marks on the bottom and followed the ol’ principle of measure twice cut once. Once I was satisfied, I used my jig saw to cut it out. I then took a 2.5” wide pallet plank and nailed it into the bottom to serve as the footer/toe-kick.


After lots of looking for some sort of free solution….I folded and bought some 1/2” plywood to make the doors along with some european hinges. I made the opening exactly 24” tall so that I could just buy a 2’x4’ piece of plywood. I cut these down to a width of 16.5”.
I decided to build some shelves on the inside. To do this I just used some thin scraps that I had lying around, screwed them in level on both sides, and then nailed in some pallet planks on top. I wanted the shelf to act as a door stop so I used this little trick. I placed the plywood inside the cabinet and then clamped a scrap piece of wood to the face of the console. Then from the inside I pressed the thin scraps firmly against the plywood to ensure a nice snug door closing.

Here’s where I ran into the most difficult part of the whole project….getting the doors to fit nice and snug and not have any gaps. Any gaps would look real sloppy and I would lose the visual effect of appearing to be 20 separate drawers. This is also the part of the project that my camera’s battery died. Let’s just say there was lots of trial and error until I finally realized that the problem was with the board that I created to form the top shelf. It bowed in the middle….so although it was square on both sides and with the divider….the left side had a gap. The false fronts would cover up some of this but there would be a clear as day 1/2” gap between the two. Unacceptable. I ended up just cutting and sanding a very small piece of wood to fill that gap. It worked.
Time to instal the false fronts. I started at the top and the most important part of this process was to have nice, clean, straight, level, and consistent lines/spacing. I made my marks and then clamped a scrap piece of wood to the console and made sure that it was level. The board ensured that the bottoms of my false fronts were straight, to ensure that they were spaced out correctly, I used a scrap piece of wood that was exactly 1/2” thick. Starting from the left and working to the right, I would place wood glue on the back and then used my finish nailer to nail them into the plywood. I repeated the whole process until I got to the bottom. I allowed for a 1” gap between each row.
Equally as important to the drawer fronts being straight/consistent were the knobs. I found the center of the top drawer front and the bottom drawer front and then held my meter stick up to it and drew one long straight line. Repeated this for all 5 rows and repeated the same process for all 4 columns. I then drilled a hole at the intersection and then screwed in some wooden knobs that I picked up from Home Depot.


Time for paint. We decided on the white weathered technique that I’ve used here and here. So I painted the whole thing with my off the shelf white Valspar. After it was dry, I strategically sanded down edges, knots, and other strategic areas to give it that distressed look. I was going for a subtle look. After that, I used Special Walnut stain to dirty up the white as well as to soak into the spots that I had sanded down.


I also decided to put a coat of poly onto the antique wood top. It darkened it up a whole lot. I was initially bummed about this but I’m starting to be won over by it.


Now it was already to be put together but I still needed to take care of some last minute details. First up, the backing. I needed to have something on the backside of the console. Again, I looked everywhere for something free. I found what I was looking for in our own house. I removed the backing off of one of our dressers (Ellie doesn’t know this yet….so we’ll keep this between me and you). I could have just nailed/stapled to the backside of the table but since the console was going to be at our entry way right at our front door, I thought you’d be able to easily see it and did not think it would look good. So I took out my router, with my rabbiting bit, and removed 3/8” along the inside edges. I had to use a chisel to clean up some spots/corners.

One other thing that I had to do before assembling is add some weight to the backside. Since the doors with the false fronts are pretty heavy, when I had both the doors open the console wanted to lean over. To compensate for this I just cut one of the real thick pieces of pallet and nailed it to the upper part of the cabinet. It won’t be noticeable and it adds enough weight to make it more stable.

Phew…..last step…..assembly. I used some wood glue, centered the antique wood top, clamped it all down, and put a couple of screws into it from the underneath. I cut the backing to size and then stapled that onto the backside.


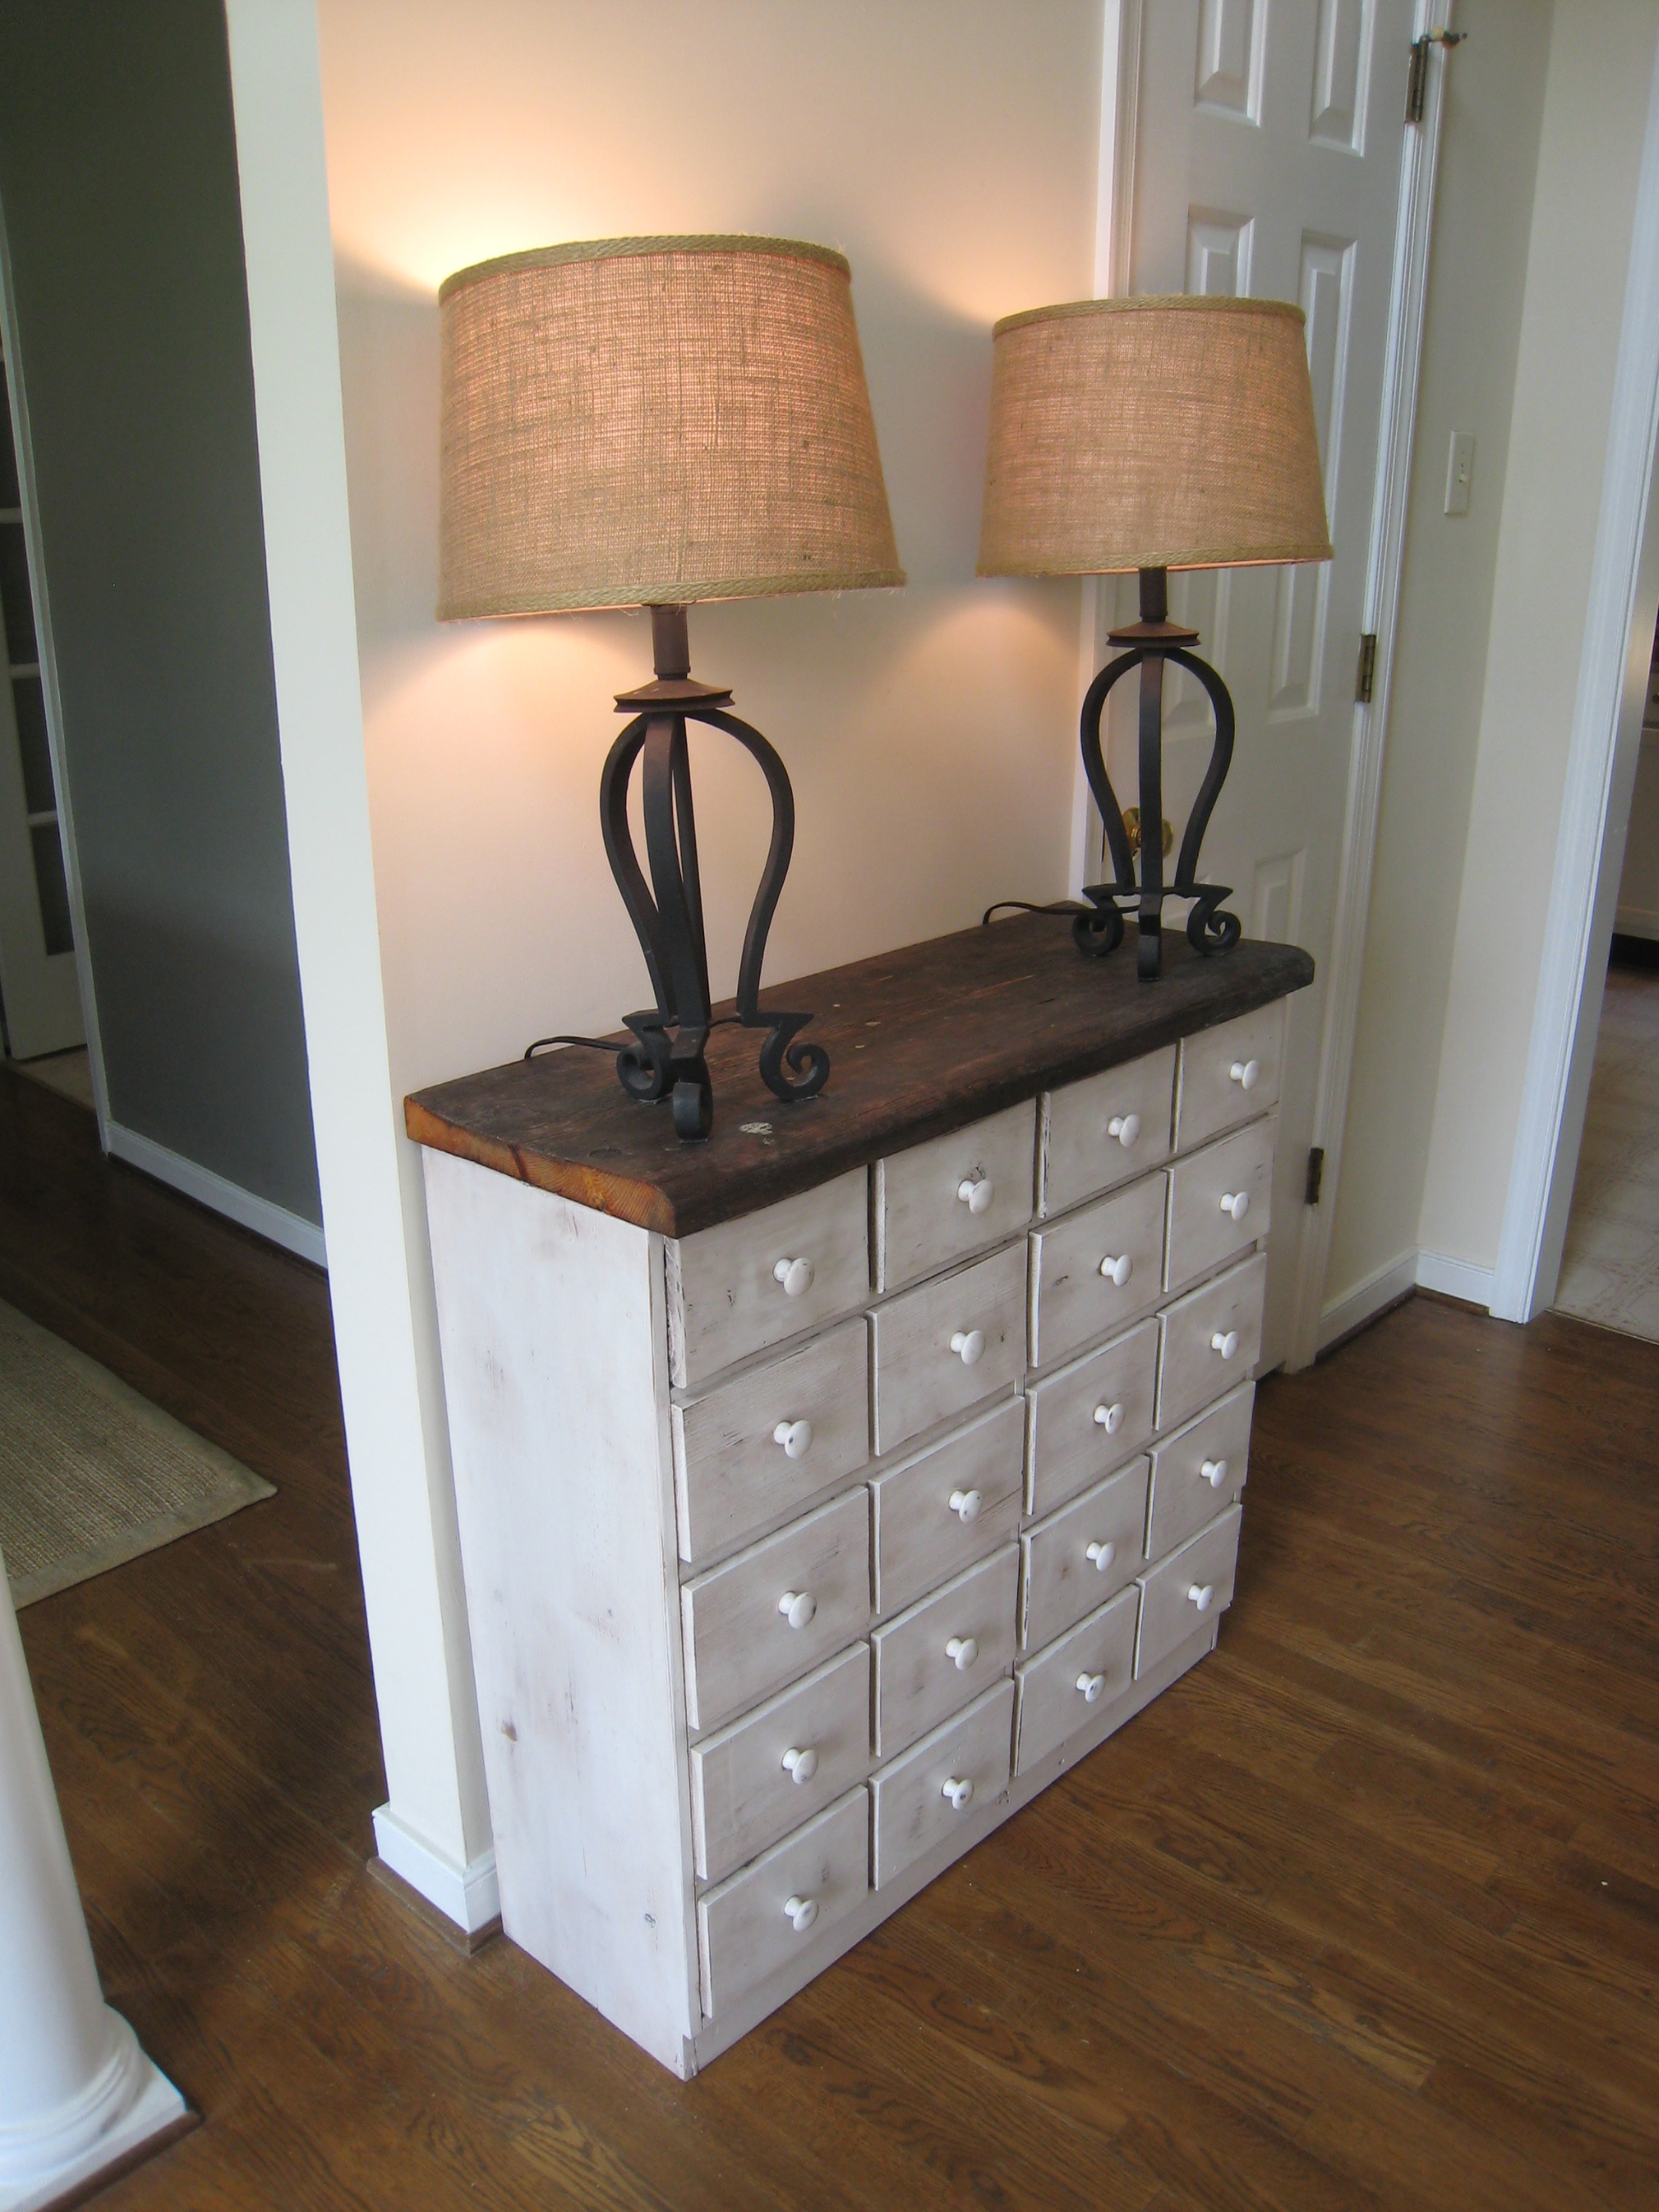
Alright….the moment you’ve been waiting for…..the final product accompanied by some free lamps that I found alongside the road.


Well…..there you have it folks. The longest blog that I have ever written. 95% of it was made with wood from pallets…..who’d-a-thunk-it. Leave some comments, I’d love to hear what you think about this project.
Spread The Love, Share Our Article
Trackbacks
There are no trackbacks on this entry.

Comments
There are no comments on this entry.