Arctic Ice Backsplash…Finally!
It was approximately one year ago that we started renovating our kitchen. Slowly but surely we have chipped away at our list of projects to complete and last weekend we moved forward another step towards fulfilling phase 1 of the kitchen remodel. Since the first day we painted the kitchen, we had our eyes set on a glass mosaic tile from Home Depot called “Arctic Ice.” At about $9/sq. foot we were hesitant to commit. We also dabbled with the idea of doing some standard 3×6″ subway tiles. In fact, I purchased some off of Craigslist but ended up not liking them <~~~they had a matte finish versus a nice glossy finish (maybe we can find another use for them somewhere else?).
Anyways, we finally took the plunge on purchasing the tile and other supplies needed and this last weekend I had my first experience with tile. Overall, I liked tiling. It was definitely more time consuming that I had anticipated. I’m also still undecided about my opinion on the glass mosaic tile. It was hard for me to have a perfect cut especially on the rows that I had to rip down in size. Either the glass would chip and the color was cut sharp or the glass would be cut clean and the color would rip rough.
Long story short, I watched a ton of videos on Youtube for how to install a kitch backsplash and followed their directions to a “t.” The biggest thing that I learned was that the tile spacers that I got from Home Depot didn’t really make sense to me.

I stopped by Lowe’s after the project and really liked the design of their tile spacers;
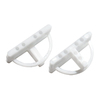
Should of, could of, would of
I let the tile dry for over 24 hours and then grouted it all. This was a lot messier than I envisioned and it was also a lot harder to remove the haze and to sponge it down as people make it out to be (I think because it was a glass tile and shows up a little easier).
After about 3 days, I applied a grout sealer. For that, I used a spray can of grout sealer and sprayed all the grout lines. After 5-10 minutes I used a dry cloth to wipe down the tiles.
Also while I had the countertops cleared off, I decided to take advanatage of the clear space and sand down the wooden countertops and apply 4 new coats of General Arm-R-Seal to them.
In the pictures it doesn’t look like much of a change but it definitely “feels” more finished now. And we won’t have to worry about splashing water out of our farmhouse sink onto the drywall any more.
Whatcha think? Was it worth the wait (and money/time)?


elliesibiga
38
4


What grout did you use? Thanks!
I’m ready to tackle my kitchen and will be using the same artic ice backsplash. I found you from searching for pics of the tile. I love how it turned out. Please tell me what you used as an edge tile? Your finished kitchen has motivated me to paint my cabinets white and put in a backsplash. With any luck it will look as good as yours. Thanks!
We used some single long teal pieces from a 12×12″ piece that was right next to the artic ice. I think we needed to buy 2 of the 12×12″ pieces in order to get all the long pieces we needed…..but after I installed it, I realized that another way of doing it would have just been to remove a row of the artic ice and run it vertically to trim it all off. And unfortunately, I don’t remember what the grout was called….it was a pre-mixed color that we also bought from HD.
Love the monochromatic look with the wall color and tiles. Do you know what the paint color was?
It’s Martha Stewart’s “Rainwater.”
I am torn between the arctic ice backsplash and another i bought from home depot online, which is more of a pearl white. Could you please tell me the color name of the grout you used? I kinda like the greenish tint with the arctic ice backsplash.. does your backsplash have a hint of green hue that you like? thank you!!
Beautiful job!
I’m planning to put those artic ice tiles too but am hesitant between those ones and the same from MS international (Home Depot) but subway tiles. I would have to order those online, they are a bit cheaper but am worried about that mat finish you are refering too. Were your Craigslist ones the same kind or different brand?
Also, what tool do I need to cut the tiles?
Thanks a lot for putting picture, love the transformation!
LOVE your kitchen!! Where did you get your curtain hanging in your windows??? I LOVE the colors. I really enjoy your blog. Thanks for sharing so many great projects.
Hey Sarah,
I made the Roman Shades last spring. The fabric is from a local store here in Richmond called U-Fab, but I have seen it online. It’s by Braemore, called “Gorgeous Pearl.” Here’s a link where it can be found online: http://www.onlinefabricstore.net/decor/drapery-fabric-and-supplies/drapery-fabric-by-manufacturer/braemore-gorgeous-pearl-fabric-.htm
Hi Tabitha,
The countertops are from IKEA. Oak numerar I believe. We bought them in the store last spring and took them directly to Home Depot to have them cut in the measurements we needed so that we wouldn’t have to worry about doing the cutting at home.
Tommy could give you more info on the solution he uses to seal the countertops (he does that every few months).
We love having oak countertops – my only caution is the maintenance. You can’t use a typical countertop cleaner with bleach or heavy chemicals. Instead I use a counter top spray that is wood-friendly. Not a huge deal, just something to be aware of.
could you please tell me where you got your counter tops from?
I really enjoy your blog and keep up the good work. One small suggestion for a future project one that I even took on in my own fixer upper is replacing those outlets and switches. Update those yellowish looking switches so they don’t stand out so much from the new white switch covers. It is relatively cheap and fast to do. Just my two sense. I look forward to future articles.
Nils